


So my sisters birthday came first and of course the letter was late...but it did arrive.Then off to my niece,2nephews ,another sister,my father in law and oh yeah me. Thankfully I don't have to do one for myself haha!(but I might anyways, I don't like to feel left out LOL) Anywho my niece turned 3 yrs old so it was easy to make her a card. SO that will be the card I'll talk about today. First lay out all your supplies(Mine went missing, so I improvised, which you will see) But get everything ..crayons,pencils,markers,glue,paper everything .
1.) Take a piece of thin poster board(I took the back of a notebook,yep I just ripped it off!)
2.)Now get a piece of white paper.Hold the paper against the poster board and cut off all excess,So the poster and paper are the same size.
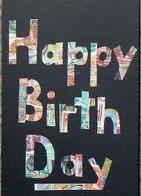
3.)Then decorate the paper with whatever you like. I did Happy B-day Ariana! Then I drew a pic of bugs bunny.*If you're not a good artist the paper is white so you can trace something cute.
4.)Color it in ,now you can be creative glue some glitter or place stickers on there be creative. I placed stickers,colored everything in real girlie then drew stars all over the place.
5.)Paste the paper onto the poster board and fold in half.
6.)With a piece of colored paper, cut around the sides to make a decoration.(I had to paint a white piece of paper and I did a swirly design ~~~~)
7.)Write whatever special message you would like on the colored paper and paste inside the card.
8.) Lastly touch it up. If something seems to be missing add it in. (I placed a slot with money, and added some decorations to the back!
Place in envelope and mail!
Like I said this was for my niece,Next are 2 nephews so they will probably get something with a print out on it (they're a little older)
I hope this helped any one and if not maybe just a fun craft for children.
Enjoy!


I am so not creative like that...thanks for the steps.
ReplyDelete